
The restoration process, in order: stop the source, map moisture with thermal imaging, extract standing water, set drying equipment, monitor daily until dry, document everything for your insurer, then rebuild. Workmanship carries a 2-year transferable warranty. Live-answered 24/7 from South Jordan, UT.
Our Water Damage Restoration Process
Most of the anxiety that follows a water damage event is not really about the water. It is about not knowing what happens next. Who comes? What do they do? How long does it take? Will the walls have to come down? What does my insurance actually cover? The uncertainty is its own kind of damage — and it compounds quickly when the person on the other end of the phone can only offer vague reassurances.
This page answers those questions with specificity. It describes exactly how True Day Water Damage Restoration handles every project — from the first phone call through the final walkthrough — using a process governed by the ANSI/IICRC S500 Standard for Professional Water Damage Restoration, the industry’s most rigorous technical benchmark. We are a licensed Utah Contractor (#960332-3505) and IICRC-Certified Firm (ID #927354-5258), and every phase described below is performed by our own team, not subcontracted out.
Questions before you read? Call us directly at (385) 247-9359.
Why Process Matters More Than Equipment
Every restoration company will tell you they have industrial equipment. Truck-mounted extractors, low-grain refrigerant dehumidifiers, high-velocity air movers — the hardware is accessible to anyone with a business account at a restoration supply distributor. What separates a properly executed restoration project from an inadequate one is not what equipment was used, but whether the operator understood when to use it, where to place it, how much of it was needed, and — critically — how to confirm the work was actually finished rather than just appearing finished.
In South Jordan specifically, that process knowledge has to account for local variables that generic restoration playbooks do not address. The expansive clay soils left by ancient Lake Bonneville retain and release moisture differently than sandy soils. The hard water supplied by the Jordan Valley Water Conservancy District — 7 to 10 grains per gallon of dissolved calcium and magnesium — accelerates corrosion in the same plumbing fittings that fail and cause the events we are called to restore. Hydrostatic pressure from snowmelt off the Oquirrh Mountains and Wasatch Range drives water through foundation walls in ways that are not obvious from the interior. A technician who does not know these things will dry the visible water and leave the rest.
Our process is designed to find what is not visible and address it completely — not just fast.
Phase 1 — Emergency Call and Immediate Dispatch
When you call (385) 247-9359, a real member of our team answers — not an answering service, not a national franchise call center routing to whoever is available. In the first two minutes of that call, we are already gathering information: What is the water source? How long has it been running? What areas are affected? Is there any sewage involvement? Are there electrical panels or appliances in the flooded area?
Those questions are not administrative — they determine what equipment we load, how many technicians we dispatch, and what personal protective equipment they bring. A Category 3 sewage backup in a finished basement requires a fundamentally different mobilization than a supply line failure in an unfinished utility room, and conflating them wastes time that matters.
While we are en route, we walk you through the immediate steps that limit further damage: how to locate and operate the main water shutoff, whether to cut power to affected circuits, what not to touch if sewage contamination is suspected, and what to photograph before anything is moved. These first-hour decisions have real consequences for what is salvageable and what the insurance claim ultimately covers. See our Emergency Services page for the complete checklist.
Phase 2 — On-Site Safety Assessment and Water Category Classification
Our lead technician’s first action on arrival is an assessment for electrical and structural hazards — not extraction, not documentation, not equipment placement. A flooded space with live electrical circuits is not a restoration site; it is a hazard scene. We confirm the space is safe or we make it safe before anyone enters with equipment.
The second action is water category classification. The IICRC defines three categories based on the contamination level of the water source:
- Category 1 — Clean Water: From sanitary sources — supply line failures, water heater discharges, ice maker line ruptures, clean rainfall intrusion. Poses the least health risk if addressed promptly. The mineral-laden hard water from the Jordan Valley Water Conservancy District’s culinary supply is still Category 1 at the point of failure, though the calcium carbonate scale it deposits inside plumbing fittings is what caused the failure in the first place.
- Category 2 — Grey Water: From sources containing biological and chemical contaminants — washing machine overflows, dishwasher failures, sink and shower drain backflows, some secondary irrigation system failures. Contains detergents, biological matter, and potential pathogens. Requires antimicrobial treatment of all affected porous surfaces and removal of any materials that cannot be adequately disinfected.
- Category 3 — Black Water: The most hazardous classification — raw sewage backflows, floodwater from outdoor sources, water that has been standing long enough to develop significant microbial activity. Contains fecal coliform bacteria, enteric viruses, protozoan parasites including Cryptosporidium and Giardia, and other pathogenic microorganisms. Requires full personal protective equipment, containment, and disposal protocols that are entirely different from clean water response. Category 3 events in South Jordan most commonly occur when municipal sewer collection lines experience hydraulic surcharge during intense monsoon rainfall, forcing sewage backflow through floor drains and basement fixtures.
This classification is not a formality. It determines what protective equipment our technicians wear, what materials must be removed rather than dried in place, what surfaces require disinfection, and what documentation your insurance carrier will require to approve the full remediation scope. Misclassifying the water category — calling a grey water event a clean water event, for instance — leads to inadequate cleanup that creates ongoing health risk and potential claim disputes. Learn about all water damage categories.
Phase 3 — Moisture Mapping and Full Scope Definition
Before a single piece of drying equipment is placed, we map the complete extent of water migration through the structure. Water does not stay where it lands. It travels — following the path of least resistance through wall cavities, beneath flooring assemblies, along structural framing, through ceiling drywall, and into adjacent spaces that show no visible sign of damage from the room below or beside them.
We use two primary tools for moisture mapping:
- FLIR thermal imaging cameras detect the temperature differential created by evaporative cooling on wet surfaces — a wet wall cavity is cooler than a dry one, and that thermal signature shows up in infrared imaging even when the painted surface above it appears completely normal. In homes with complex architectural geometry — the multi-level townhomes in Daybreak, the split-entry ranchers common in established South Jordan neighborhoods, the finished basement additions on older lots near the Jordan River corridor — thermal imaging reveals moisture migration patterns that would require dozens of destructive holes to locate by conventional probing.
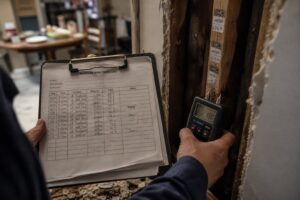
- Calibrated penetrating moisture meters measure the actual moisture content of specific materials at specific points — expressed as a percentage that can be compared against the established dry standard for that material type. These readings are taken at every location identified by thermal imaging and at systematic intervals throughout the affected area, creating a quantitative moisture map rather than a visual impression.
The moisture map defines the true scope of the restoration. It tells us exactly where drying equipment must reach, which materials are wet enough to require removal, and which structural assemblies need to be opened up to allow direct airflow contact. It also establishes the baseline against which we measure drying progress every day until the project is complete. Learn more about our moisture detection services.
Phase 4 — Scope of Work, Estimate, and Insurance Coordination
With the moisture map complete, we prepare a detailed written scope of work that defines exactly what will be done, what materials will be removed and replaced, the projected timeline for each phase, and the estimated cost of all work. We walk through this scope with you in plain language before authorizing anything — no technical jargon designed to obscure what you are agreeing to, no scope surprises discovered on the invoice.
This is also where insurance coordination begins. We contact your carrier and begin building the documentation package the adjuster will need: the thermal imaging report, the baseline moisture readings, photographs of all visible damage, and the written scope estimate. Our scope estimates are generated in insurance industry-standard estimating software, formatted in the line-item structure that commercial carriers require. Whether your policy is through Bear River Mutual, Allstate, State Farm, or another carrier, the documentation format is one their adjusters use daily.
If the adjuster’s initial scope differs from ours — a common situation when visible damage has been documented but hidden moisture has not yet been assessed by the carrier — we provide the supporting thermal imaging and moisture data to justify the complete scope. Initial estimates are not final, and we advocate for the documentation of what is actually needed rather than accepting a scope that will leave work undone. Learn more on our Insurance Claims Assistance page.
Phase 5 — Emergency Water Extraction
With the scope defined and authorization in place, extraction begins immediately. We deploy truck-mounted extraction units — the highest-capacity water removal equipment available in the restoration industry — to remove standing water from the affected areas as quickly as possible.
The difference between truck-mounted extraction and a portable wet-vac is not a matter of degree — it is a matter of mechanism. A shop vacuum removes free-standing liquid only. A truck-mounted extractor generates enough vacuum to pull water that has been drawn by capillary action into carpet padding, subfloor oriented strand board, and the pores of concrete — water that has already left the surface and entered the material. That subsurface water is the primary driver of drying time, material damage, and mold risk. Removing it during extraction rather than leaving it to evaporate during drying saves days from the project timeline and significantly expands the range of materials that can be saved rather than replaced.
Following bulk extraction, we perform deep extraction passes using weighted carpet wands that press firmly against the carpet pile and pull water from the padding beneath with each pass. This step is often the most visually unimpressive part of the process — the carpet is already extracted, the floor looks almost dry — and it is the step that most inexperienced operators skip. We do not skip it. Learn more about our water extraction services.
Phase 6 — Controlled Demolition and Material Assessment
Not every material that got wet needs to be removed. Not every material that looks dry is salvageable. The skill in this phase is accurate discrimination between the two — removing what must go, preserving what can be saved, and making that determination based on objective moisture data rather than visual inspection or the path of least resistance.
Materials that must be removed include:
- Wet carpet padding — always removed, regardless of water category or saturation time. Its foam or fiber matrix retains water at a level that prevents effective in-place drying, and the space between padding and subfloor becomes an anaerobic environment ideal for microbial growth and mold amplification within 24 to 48 hours.
- Saturated drywall — gypsum board that has been wet beyond a recoverable threshold loses structural integrity and harbors mold within the paper facing regardless of surface appearance after drying. We cut clean lines at structural members, removing only what the moisture data indicates is necessary.
- Wet insulation — fiberglass batt and cellulose insulation cannot be dried effectively in place. They retain water, lose their thermal resistance value, and create sustained moisture conditions in the wall cavity that prevent the framing from drying. Removal and replacement is standard.
- Any porous material that contacted Category 2 or Category 3 water — grey water or sewage contamination of porous materials cannot be reversed through drying and antimicrobial treatment alone. Removal is required.
All removed materials are properly bagged and disposed of — and for Category 3 sewage-contaminated materials, disposal follows applicable health regulations. Learn more about our drywall repair and flooring removal and replacement services.
Phase 7 — ANSI/IICRC S500-Compliant Structural Drying
Structural drying is the longest phase of the restoration process and the one where the difference between a professionally executed project and an inadequate one is least visible from the outside — which is precisely why it matters most.
Our process starts with a psychrometric assessment of the drying conditions. Psychrometrics is the branch of physics concerned with the thermodynamic properties of moist air — measuring dry-bulb temperature, wet-bulb temperature, relative humidity, dew point temperature, and specific humidity to characterize the moisture conditions in the space. These measurements allow us to calculate the optimal equipment load — how many air movers and dehumidifiers are needed, what type, and where they should be positioned — rather than guessing or applying a generic ratio of equipment to square footage.
The drying system we deploy operates on a continuous cycle: high-velocity air movers accelerate evaporation from structural material surfaces, increasing the vapor pressure at the material boundary; low-grain refrigerant dehumidifiers process the resulting moisture-laden air, condensing water vapor onto refrigerant coils and discharging it as liquid — continuously lowering the vapor pressure of the ambient air and maintaining the gradient that drives moisture migration out of structural materials and into the air where it can be captured.
In South Jordan’s basement environments specifically — where expansive clay soil maintains ground-contact surfaces at cooler temperatures that slow evaporation, and where limited natural airflow creates stratification in the drying air column — equipment placement must account for these conditions explicitly. We adjust configurations daily as drying progresses and as the moisture data indicates.
All monitoring points are read every day. Every reading is recorded, timestamped, and added to the project drying log. Drying is not considered complete until readings confirm that all materials have returned to their equilibrium moisture content — the species-appropriate dry standard for each material type under the current ambient conditions. The drying log that documents this process is the most important piece of documentation your insurance carrier will receive. Learn more about our structural drying and dehumidification services.
Phase 8 — Antimicrobial Treatment and Mold Prevention
Mold spore germination can begin within 24 to 48 hours on damp cellulose-based building materials — wood framing, drywall paper facing, OSB subfloor panels — under the temperature and humidity conditions common to a water-damaged interior. Mold amplification does not announce itself. It occurs inside wall cavities, beneath flooring, and within structural assemblies where it is invisible until the colony is large enough to produce visible surface growth or detectable microbial volatile organic compounds that present as musty odor.
After extraction and equipment deployment, we treat all exposed structural surfaces — wood framing, concrete, masonry, and any remaining building materials in the affected area — with an EPA-registered broad-spectrum antimicrobial agent. The treatment is applied at manufacturer-specified concentrations with appropriate dwell times to achieve effective inhibition of mold, bacteria, and other microbial growth during the drying period and beyond.
This step does not replace complete drying. Antimicrobial treatment of a still-wet surface provides limited protection — the agent is diluted by the remaining moisture and the surface conditions continue to favor growth. Treatment works as an adjunct to complete structural drying, not a substitute for it. If active mold growth is discovered during the project, we implement our full mold remediation protocol — containment, HEPA air filtration under negative air pressure, physical removal of contaminated materials, and post-remediation verification.
Phase 9 — Drying Verification and Equipment Removal
Equipment is never removed based on elapsed time or on the appearance of surfaces. It is removed when the moisture data says it should be — and not before.
Final verification involves a comprehensive set of moisture meter readings at every established monitoring point throughout the affected area, compared against the baseline readings taken at project initiation and against the IICRC dry standard for each specific material type. The dry standard is not a single number — equilibrium moisture content varies by wood species, drywall composition, concrete mix design, and the ambient temperature and relative humidity conditions in the space. Applying a generic threshold to all materials is imprecise and frequently results in removal of equipment before framing or subfloor has actually reached a stable dry condition.
When all readings confirm completion, we compile the full drying documentation package: the initial thermal imaging report, all daily moisture logs with timestamps, equipment placement records, and the final verification readings. This package is provided to you and to your insurance adjuster as the evidentiary record of the completed drying project.
Phase 10 — Licensed General Contractor Reconstruction
True Day Water Damage Restoration holds a Utah General Contractor License (#960332-3505). That means the same company that dried your structure rebuilds it — there is no handoff to a separate contractor, no gap in documentation, and no divided accountability for the quality of the finished result.
Reconstruction scope depends on what was removed during demolition, but typically includes some combination of:
- Drywall installation, taping, finishing, and texture matching — including the skip-trowel, knockdown, and orange peel textures common throughout South Jordan’s residential construction
- Insulation replacement with appropriate type and R-value for the specific wall or ceiling assembly
- Flooring installation — hardwood, engineered hardwood, luxury vinyl plank, carpet, tile, and laminate, matched to existing adjacent materials wherever possible
- Painting — primed with stain-blocking shellac-based or oil-based primer where any residual staining or odor compounds exist, then finished to match existing adjacent surfaces
- Trim, baseboard, and molding reinstallation matched to existing profiles
- Cabinetry repair or replacement where water damage affected built-ins, vanities, or kitchen cabinetry
- Structural framing repair where members were compromised by prolonged moisture exposure or required removal
Our quality standard is a finished result that is indistinguishable from the pre-loss condition — not simply functional. That means we take the time to properly match textures before committing to the full surface, to use appropriate primer before paint, and to address the small finish details — caulk lines, transition pieces, paint edges — that separate a restoration that looks like a restoration from one that simply looks like a repaired home. Learn more about our reconstruction and repair services, drywall repair, and flooring replacement services.
Phase 11 — Final Walkthrough and Project Closeout
When all reconstruction is complete, we conduct a final walkthrough of the entire restored area with the property owner. This is not a formality. It is the moment the project is actually complete — when the person who was standing in a flooded room, or driving home to a call about a burst pipe, or waking up to a sewer backup in the basement, walks through a space that shows no evidence any of it happened. That moment matters to us. We do not consider a project finished until it matters to the client as well.
Any touch-ups or items identified during the walkthrough are addressed before we close out the project. We then provide the complete documentation package for your records and your insurance file — thermal imaging reports, daily drying logs, scope of work, all change orders, project photographs, and invoices formatted for insurance submission.
How This Process Applies to South Jordan’s Specific Conditions
The eleven phases above apply to every project. What varies — and what makes local experience genuinely valuable — is how each phase accounts for the specific material, environmental, and hydrogeological conditions of this community.
The Wasatch Front’s freeze-thaw cycles create pipe failure patterns that are predictable by season and by construction era. The calcium and magnesium scale from the Jordan Valley Water Conservancy District’s hard water supply causes supply line failures that look sudden from the outside but reflect years of progressive internal degradation. The expansive clay soils of the Salt Lake Valley — lacustrine deposits from ancient Lake Bonneville — create foundation stress patterns that are fundamentally different from the sandy soils of coastal markets where many restoration protocols were developed. The summer North American Monsoon season creates condensate overflow and sewer surcharge events that are predictable by month. The elevation and snowpack of the Wasatch Range drives spring hydrostatic pressure against foundation walls at a scale that is specific to this geography.
A technician who has responded to hundreds of water damage events in this valley carries that pattern knowledge into every assessment. It shapes what they look for, where they point the thermal camera first, what questions they ask about the structure’s history, and what they flag as a secondary risk that the property owner may not know to be concerned about.
That is what we bring to every project. Not just equipment and process — local knowledge that makes both more effective.
Related Services
- Water Damage Restoration
- Emergency Water Damage Services
- Water Extraction
- Moisture Detection
- Structural Drying
- Dehumidification
- Basement Flooding Cleanup
- Insurance Claims Assistance
- Mold Remediation
- Sewage Cleanup
- Drywall Repair
- Flooring Removal & Replacement
- Reconstruction & Repairs
- Contents Cleaning & Pack-Out
- Category 1 — Clean Water Damage
- Category 2 — Grey Water Damage
- Category 3 — Black Water Damage
- Water Damage Restoration Cost Guide
- Water Damage Emergency Guide — South Jordan, UT
Contact True Day — South Jordan’s Licensed Restoration Team
If you have questions about what the restoration process will look like for your specific situation — the type of water, the materials involved, the insurance implications — call us directly. We would rather spend fifteen minutes on the phone helping you understand what to expect than have you spend that time searching for answers that may not apply to your property or your local conditions.
True Day Water Damage Restoration
11268 S 2865 W, South Jordan, UT 84095
Phone: (385) 247-9359
Email: info@truedaywaterdamagerestoration.xyz
Utah Contractor License: #960332-3505
IICRC Certified Firm ID: #927354-5258
What True Day guarantees on every job
Our 7-step water damage restoration process, in order
From the first phone call to the final warranty handoff. Every job goes through all seven steps — some are shorter, none are skipped.
- Emergency response & on-site assessmentOur live dispatcher takes the call, dispatches the on-call technician while you’re still on the phone, and the first technician arrives per our per-city drive times. On-site, water category and drying class are called, the loss is photographed and measured. Timeline: minutes.
- Water extractionStanding and bulk water is extracted first — truck-mounted or portable units depending on access. Carpet pad is pulled unless a same-day Category 1 loss allows pad-in-place drying. Timeline: hours of first day.
- Structural dryingAir movers and LGR dehumidifiers placed per IICRC S500 drying math (see our 8-step drying protocol). Daily moisture logs tracked against a dry benchmark set on day one. Timeline: typically 3–5 days.
- Mold assessment & remediation (if indicated)If water category warranted it, if timeline put us past the 48-hour mold window, or if we detected microbial activity during moisture mapping, the mold scope opens with containment, HEPA scrubbing, and AMRT-certified technicians. Timeline: 1–3 days, overlaps drying.
- Sanitization & antimicrobial treatmentAffected materials and surfaces are treated per IICRC S500/S520 — thymol and accelerated hydrogen peroxide applications on wood, drywall, framing. Timeline: integrated with drying/mold phase.
- Reconstruction (drywall, flooring, trim, paint)The same True Day crew that did mitigation does the rebuild. No handoff to a separate contractor. Scope matches the day-one Xactimate estimate plus any approved supplements. Timeline: variable by scope — days to a few weeks.
- Final clearance & warranty handoffFinal moisture readings at every logged location confirm dry benchmark. Final walk-through with the homeowner. 2-year transferable workmanship warranty document signed, insurance file closed with the carrier. Direct cell number for the lead tech provided for the warranty period. Timeline: closeout day.
The documentation checkpoints your claim depends on
The restoration process itself is standard IICRC S500 across any legitimate contractor. What separates a smooth insurance claim from a frustrating one is what gets documented at each handoff. Here are the five checkpoints that drive every claim we work.
Documentation checkpoint matrix
| Checkpoint | What’s documented | Why it matters |
|---|---|---|
| Arrival (minute 0) | Wide + close photos of standing water, visible damage, affected contents. Time + GPS stamped. | Establishes what the loss looked like before any work. Carrier baseline. |
| Category call | S500 Category 1/2/3 call written on paperwork with reasoning (source, time elapsed, visible contamination). | Decides the entire scope. Carriers scrutinize this. |
| Moisture map | FLIR thermal images showing migration boundaries + GE Protimeter pin-meter readings at affected spots and unaffected baselines. | Proves the affected footprint. Without this, the carrier can push back on scope. |
| Daily drying log | Equipment running + Protimeter readings on affected areas, every day until dry standard reached. | Proves drying is actually working. Supports day count on the mitigation invoice. |
| Dry verification | Final Protimeter readings matching the unaffected baseline, with photos. | Carrier releases mitigation payment on this. |
Why handoffs are where claims die
If the mitigation contractor stops at dry-out and a different reconstruction GC starts the rebuild, every handoff is a documentation gap. The second contractor doesn’t know what the first found; the carrier sees inconsistent scope; supplements get rejected. Under one firm (us) with GC license #960332-3505 and IICRC firm status, there is no handoff.