
Hidden leaks: slow leaks inside walls, ceilings and under floors often show up only as a stain, a musty smell or a soft spot. True Day finds them with FLIR thermal imaging and GE Protimeter moisture meters before opening anything up. The inspection is free. Live-answered 24/7 from South Jordan, UT.
Hidden Water Leak Damage in South Jordan, UT
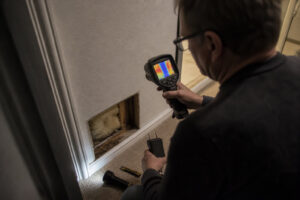 The most damaging water events in South Jordan homes are often not the dramatic ones — the burst pipe flooding the basement, the water heater discharge across the utility room floor. Those events are discovered quickly. The hidden leak is different: a slow, chronic intrusion behind a finished wall, under a floating floor, or in a ceiling assembly that introduces moisture into building materials at a rate too slow to produce any surface sign for weeks or months — while silently saturating framing, enabling mold growth, and converting what would have been a $3,000 repair into a $15,000 remediation and reconstruction project.
Hidden leaks have a particular cruelty to them. The dramatic water event — the burst pipe, the flooded basement — at least announces itself. The hidden leak does not. It works quietly, behind the wall you painted last spring, under the floor where the kids do homework, in the attic you have not opened since you moved in. By the time it announces itself — a stain, a smell, a soft spot in the floor — it has usually been there long enough to have produced mold, to have compromised structural materials, and to have converted a $400 plumber call into a $15,000 remediation and reconstruction project. We have found Stachybotrys chartarum growing behind drywall in homes where the homeowner had no idea anything was wrong. The discovery is always a surprise. The conditions that produced it are almost never mysterious — once you know what to look for.
True Day Water Damage Restoration is a licensed Utah Contractor (#960332-3505) and IICRC-Certified Firm (ID #927354-5258), based at 11268 S 2865 W in South Jordan. Call us at (385) 247-9359.
Where Hidden Leaks Occur in South Jordan Homes
Construction defect moisture intrusion in Daybreak and newer communities: Daybreak’s rapid 2006-to-2015 production-builder construction produced a documented pattern of building envelope defects in some homes — improperly flashed window rough openings, missing kickout flashing at roof-to-wall intersections, weep screed installed too close to grade on stucco-clad assemblies. These issues can lead to persistent slow water seepage into wall cavities behind finished surfaces, often at such minimal rates that visible staining may not appear for months or even years. Once a stain is visible on the drywall, it usually indicates that the wall cavity framing has remained damp for an extended period, which can lead to the growth of Aspergillus and Penicillium, or, in prolonged saturation scenarios, the colonization of Stachybotrys chartarum behind the surface. Compressed fitting and supply line failures behind finished walls: The hard water mineral scale from the Jordan Valley Water Conservancy District’s supply degrades compression fittings serving ice makers, under-sink water filters, and refrigerator connections — producing slow seeps that discharge inside cabinetry or finished wall spaces. A fitting that leaks at a rate of one drop per second can release 86 gallons of water daily, which is enough to keep the wall assembly behind the cabinet at a humidity level conducive to mold growth, often without any visible signs for several weeks. Shower and tub surround failures: Grout cracking, caulk joint failures, and fiberglass surround stress cracks allow water to penetrate behind tub and shower assemblies with each use. The water migrates through the substrate — typically cement board — and into the framing behind it, accumulating over months. The adjacent bedroom or hallway wall may develop a musty odor before any visible staining appears. HVAC condensate line slow failures: Condensate drain line partial blockages — from mineral scale or biological growth in the drain tube — produce condensate pan overflows that discharge water into ceiling assemblies adjacent to air handler units at a slow, chronic rate. The pan overflow typically occurs during HVAC cycles and dries partially between cycles, producing the pattern of intermittent moisture that Cladosporium and Penicillium colonize on ceiling drywall assemblies over time.A Hidden Leak We Found in Daybreak Before It Became a Major Remediation
In May 2022, we received a call from a Daybreak homeowner who had noticed a faint musty smell in a corner bedroom — the kind of smell that comes and goes and is easy to attribute to something else. She had lived with it for approximately four months before calling us, assuming it was the HVAC filter or something stored in the closet. Nothing in the room showed visible staining. The paint was intact. The baseboard was dry. There was no obvious source. Our FLIR thermal imaging scan showed a cold zone — a defined area of evaporative cooling from wet material — in the exterior wall adjacent to the west-facing window. The cold zone extended from approximately 12 inches below the window rough opening to the floor, covering a 3-foot horizontal span. It was not visible on the room surface in any way. Calibrated moisture meter readings at the wall surface confirmed moisture content in the drywall at 19% to 24% — elevated above the 12% to 16% dry standard. We opened a 12-inch inspection cut at the point of highest moisture reading and found Aspergillus and Penicillium colonization on the paper facing of the drywall, the OSB sheathing behind it, and the lower 18 inches of the window jack stud. The moisture source was a missing kickout flashing at the roof-to-wall intersection above the window — a construction defect allowing rainwater to run directly behind the cladding and into the wall assembly with every rain event, for what was likely the entire four years the home had been occupied. The remediation scope — containment, drywall removal, mold treatment of the OSB sheathing and framing, coordination of the kickout flashing installation with a roofing contractor, structural drying, and reconstruction — came to $5,200. Had the homeowner called when the smell first appeared four months earlier, the scope would likely have been $2,800. Had she waited another six months, the sustained wet conditions would likely have produced Stachybotrys chartarum on the chronically wet OSB — which would have required enhanced protocol remediation and pushed the scope above $8,000. The musty smell in the corner bedroom was the only warning this home ever gave. She had almost ignored it.How We Find Hidden Leaks
Hidden leaks evade detection through visual assessments of finished surfaces, as the damage typically lies concealed behind them. We rely on two key tools that can uncover details not visible during a standard inspection: FLIR thermal imaging cameras detect the temperature differential created by evaporative cooling of wet material surfaces — revealing moisture migration patterns inside wall cavities, beneath flooring, and above ceiling panels without destructive investigation. The wall assembly may appear visually intact, but a slow leak from a compression fitting behind the drywall creates a distinct cold zone on the infrared image, indicating wet framing. Calibrated penetrating moisture meters quantify the moisture content at specific points — confirming the thermal imaging finding with a measured value that can be compared against the dry standard for that material. Framing reading 24% moisture content against a dry standard of 12% to 16% has been at elevated moisture long enough for mold germination to have occurred, regardless of the surface appearance. The combination of thermal imaging and moisture metering defines the true scope of a hidden leak — including how far moisture has migrated by capillary action beyond the visible wet area — without opening unnecessary wall sections. Learn more about our mold inspection and testing services and moisture detection services.- How do I know if I have a hidden water leak?
- A faint musty smell with no visible water damage is the most reliable early indicator — microbial volatile organic compounds from Cladosporium colonization precede any surface staining. A wall section feeling slightly cooler than adjacent sections on cold mornings indicates evaporative cooling from moisture in the wall cavity. Reduced water pressure at a specific fixture indicates bore narrowing from scale accumulation.
- Why do prior contractors find nothing that a thermal camera then finds?
- Three-coat plaster has extremely low permeance — the finish surface reads normal on a scanning meter regardless of framing moisture behind it. FLIR thermal imaging detects the evaporative cooling at the wet framing through the plaster — a 2°F to 5°F differential the camera captures and visual inspection or touch cannot. FLIR is a required component of any moisture assessment in pre-1980 plaster construction, not an optional upgrade.
The leak you don’t see until it’s structural
A hidden leak is one that releases water inside wall cavities, under floors, or above ceilings — where you cannot see it until the symptom appears. By the time the symptom shows, the leak has typically been active for weeks or months.
Where water hides in a Utah home
- Supply-line pinhole leaks inside wall cavities (common on older copper or 1990s polybutylene)
- Shower-pan membrane failures that drain into the floor assembly below
- Toilet wax-ring leaks that migrate into the subfloor over months
- Dishwasher supply or discharge connections behind the appliance
- Refrigerator ice-maker line kinks or crimps hidden behind the unit
- HVAC condensate overflow in attics or utility closets
- Vent-pipe or roof-flashing leaks that enter above the ceiling plane
Signs you may have one
- Musty smell with no visible water source
- Water bill jumped with no change in usage
- Yellow or brown ceiling or wall stain, growing slowly
- Warped or buckled baseboards or hardwood flooring
- Soft spot underfoot on a floor that was previously solid
- Mold spot appearing on a wall or ceiling
How we find them
FLIR thermal imaging walks the whole wall and ceiling plane, picking up temperature differences from wet drywall. GE Protimeter penetrating-pin meter confirms moisture content at every flagged spot. For leaks suspected inside the water supply itself, we can introduce tracer dye and listen with acoustic equipment at access points. We document the trace and the origin for your insurance adjuster.
How we find a hidden leak — and where they typically hide in SJ-area homes
A hidden leak gives you signs long before you see water. By the time there’s a visible stain, the moisture has usually traveled through two or three cavities. Here’s the detection sequence we run — and the specific places we check first in Salt Lake Valley homes:
Detection sequence
- Thermal camera scan (FLIR): wet materials show as cooler areas due to evaporative cooling — usually a 3-5°F differential; identifies suspect areas without any demo
- Pin and pinless moisture meters (GE Protimeter): confirm wet vs dry at suspect areas; readings >16% MC on wood or >1% on drywall confirm the issue
- Pressure test on plumbing lines: if the leak may be in a pressurized line (supply, hot-water circulation), we work with a plumber to pressure-test
- Dye test for drainage: colored dye in a drain line shows up where the leak is actually releasing — useful for shower pan and drain-pipe leaks
- Access cuts (last resort): if everything above points to a specific cavity and the leak must be confirmed before scoping, we cut a small inspection hole in a hidden location (closet wall, HVAC chase)
Common hidden-leak locations in Salt Lake County homes
| Age / type | Where they typically hide |
|---|---|
| 1970s-80s split-level | Shower pan at the step-down to a lower-level bathroom; galvanized supply line in the garage ceiling under the kitchen |
| 1990s two-story | Upstairs tub drain line in the kitchen ceiling; dishwasher supply line against the base of the sink cabinet; icemaker line behind the refrigerator |
| 2000s stucco or stucco-looking home | Window flashing failures (water tracks down behind the stucco weep screed and into the sheathing); roof-to-wall transitions on dormers; chimney flashing |
| 2010s-newer tract home | Shark-bite plumbing fittings in walls (slow drip from bad crimps); crawlspace supply manifold |
| Any home | Water heater pan drain line; whole-house humidifier line; ice-maker PEX connection; washer supply hose at the valve |
Signs that mean “call us for a hidden-leak inspection”
- Water bill up without a visible cause
- Musty smell in one area that doesn’t dissipate with cleaning
- Discoloration or sagging ceiling drywall in a line (indicates path, not just one spot)
- Baseboards cupping away from the wall in one spot
- Floor giving slightly in a doorway or in front of an appliance
- Mold on the exterior sheathing visible from a crawlspace or attic
How we trace a hidden leak backward (the methodology)
Finding a visible stain is easy; finding what’s causing it is the actual investigation. Water finds the easiest path, which is rarely a straight line. The methodology for tracing a hidden leak backward follows a specific sequence — here’s what we actually do:
- Document the visible evidence first. Photo of the stain or discolored area; dimensions; location in the house; nearby fixtures or appliances; adjacent-wall room on the other side. Note current moisture readings on the visible stain.
- Map the room above (or exterior wall above) looking for alignment with the visible stain. Is there a fixture, pipe, or exterior penetration above? Is there a shower, toilet, sink, or appliance that could feed this location?
- Thermal imaging scan. Scan the suspected path from the fixture or source toward the visible stain. Wet materials show as cooler on thermal (evaporative cooling). A thermal signature from source to stain is strong evidence of the leak path.
- Moisture-meter follow-up on thermal findings. Thermal catches suspects; meter confirms moisture. Pin-type meter reads materials directly; pinless scans surface moisture.
- Check the suspected source. If it’s a plumbing fixture, run the fixture; observe for drip, visible leak, pressure change. If it’s a drain line, flush and watch.
- Pressure test if needed. If a supply line is suspected but no leak is visible, a plumber can pressure-test the specific line to confirm. We coordinate with a plumber; we don’t do pressurized-system testing ourselves.
- Dye test for drainage. Colored dye in a specific drain line shows where the leak is actually discharging. Especially useful for shower pan leaks and drain-line failures.
- Access-cut inspection as last resort. If everything above points to a specific wall or ceiling cavity, we cut a small inspection opening (hidden location if possible) and visually confirm.
Common misleading evidence
- Stain is downstream of the leak, not under it — gravity + wicking + air currents move water laterally through building cavities
- Shower pan leaks often show up two rooms away or on a different floor
- Water appearing in one room is often from a leak in a completely different room
- Ice dam leaks show in winter but the fix is attic ventilation, not roof patching
What we charge for leak detection
- Standard inspection: free (part of our free-estimate scope)
- Access-cut inspection where no estimate follows: nominal fee charged only if we don’t end up doing the restoration
- Plumber coordination fee: no — we coordinate at no additional cost
What tools we actually use
- FLIR thermal camera (we use the C5 and E-series; both calibrated)
- GE Protimeter moisture meter (both pin and pinless modes)
- Flashlight + inspection mirror for cavity access
- Fluorescent dye kits for drainage testing
- Hygrometer for ambient conditions during inspection
What tools we don’t use (and why)
- Acoustic leak detection (electronic listening) — useful for high-pressure water lines but specialist tool; we refer to a plumber with that gear when needed
- Smoke pencils for air-current + moisture correlation — occasionally useful but specialist
- Hydrogen detection equipment — natural-gas and some leak-detection tools we don’t carry; refer out
Hidden leaks and insurance coverage — what’s covered, what isn’t
Hidden leaks (slow drip in wall, pipe sweat condensation, slow seepage) have specific insurance treatment that often surprises homeowners. The “hidden” nature is the main variable. Here’s the typical pattern:
| Hidden-leak scenario | Typical coverage | Why |
|---|---|---|
| Sudden pipe burst that was hidden (behind wall) and only recently discovered | Usually COVERED — the burst was sudden; the hidden nature doesn’t change that | Policy covers sudden water damage; discovery timing matters less than when it occurred |
| Slow drip for weeks or months, discovered when visible staining appears | Usually NOT COVERED — treated as “gradual damage” or “long-term seepage” | Policy excludes gradual damage; often with specific language like “over 14 days of leakage” |
| Hidden shower-pan leak dripping into ceiling below | Usually denied as gradual | Shower-pan failures are typically slow; policy exclusion applies |
| Hidden window-flashing failure letting rain in | Usually denied as maintenance issue | Flashing is a maintenance item; policy excludes maintenance failures |
| Hidden roof leak that was dripping into attic for years | Usually denied as gradual | Policy wants sudden events, not accumulated damage |
| Hidden water-main leak between street and house | Varies — some policies cover; service-line endorsement may apply | Depends on specific policy terms; some carriers offer service-line coverage |
| Hidden condensation damage (HVAC coil overflow, humidifier) | Varies — sometimes covered as sudden if equipment failure; sometimes denied as condensation exclusion | Depends on cause; equipment-failure cause often covered; routine condensation often not |
| Hidden mold from undetected moisture | Usually limited coverage (if any) | Standard homeowner has sublimit on mold (often $5,000-10,000); specific mold rider needed for full coverage |
Why “hidden” and “gradual” aren’t synonyms for insurance purposes
- “Hidden” = out of sight, not visible to normal observation
- “Gradual” = occurring over an extended time period
- Insurance exclusion is on “gradual,” not “hidden” — a hidden pipe-burst that was sudden is still covered
- The key question: did the damage occur suddenly, or over an extended period?
What makes a hidden-leak claim more likely to be denied
- Water bill shows elevated usage for several months before discovery
- Visible staining shows clear long-term accumulation pattern
- Mold growth at the leak site — takes weeks to establish, so growth confirms time elapsed
- Homeowner statements about noticing symptoms for a while before calling
What strengthens a hidden-leak claim
- Documented date of discovery vs documented date of pipe burst (if different, both captured in paperwork)
- Previous normal water bills followed by sudden spike
- Fresh damage patterns (bright stain, no accumulated mold)
- Specific plumbing event (pipe burst, fitting failure) that happened recently
What to do if you discover a hidden leak
- Stop the water immediately at the main or at the shut-off for the affected line
- Document the current condition with photos and date
- Note any recent events: did you hear a bang? Did you have recent plumbing work? When did symptoms start?
- Call insurance to file FNOL — even if coverage is uncertain, early notice helps
- Call us for immediate scope assessment — mitigation starts regardless of coverage decision
If your claim is denied for a hidden-leak
- Review denial letter — find the specific policy language used for the exclusion
- Challenge if the denial misunderstands the cause (e.g., claiming “gradual” when the leak was actually sudden)
- Service-line endorsements, hidden-water-damage endorsements may apply if you have them
- Even without coverage, our scope + Wisetack financing bridge the funding gap
Hidden-leak insurance disputes come up often. If you’ve got one, we can scope the mitigation + help you understand the carrier’s position, even if we don’t argue the claim ourselves.
Hidden leaks in rental properties — who’s responsible
Hidden leaks in rented properties involve specific tenant-landlord responsibility questions. Who should discover them, who’s responsible when they’re found, and how insurance interactions work. Here’s the general pattern:
- Tenant obligation: report signs of damage (stains, musty smell, visible leaks) to landlord promptly
- Landlord obligation: investigate reports in reasonable time + fix the underlying cause
- Shared obligation: if tenant signs lease stating “no past water damage,” both parties have accurate-disclosure responsibility
Who pays for repair + mitigation
- Landlord typically: structural repair, plumbing repair, root-cause fix
- Tenant typically: their personal property damage, additional living expenses if displaced (via HO-4 renters insurance)
- Insurance split: landlord’s dwelling policy + tenant’s HO-4 covering their respective portions
When tenant is partially responsible
- Tenant knew about the leak + didn’t report — could be partial liability for damage worsening
- Tenant caused the condition (left tub running, caused the leak somehow)
- Tenant modified property in a way that caused the leak (added fixtures without landlord permission)
When tenant has recourse against landlord
- Landlord failed to repair after prompt notification
- Landlord didn’t disclose known past water damage at lease signing
- Landlord’s negligence caused the condition (deferred maintenance, ignored prior leaks)
Specific Utah context
- Utah landlord-tenant law requires landlord to maintain the property in habitable condition
- Written lease exhibits control the specific obligations beyond state law
- Mold-specific disclosure requirements vary; most Utah leases include some mold-related language
- Rental dwelling policies in Utah have standard terms; service-line endorsements vary
What tenants should do when they discover a hidden leak
- Document immediately with photos + dates
- Notify landlord in writing (text + email create a paper trail; verbal alone doesn’t)
- Mitigate immediate harm if possible (catch drip in container, don’t DIY repair)
- Allow landlord reasonable time to investigate (usually 24-48 hours for non-emergency)
- If landlord doesn’t respond, consult Utah tenant resources or an attorney
- Keep receipts for any out-of-pocket costs if displacement or urgent action is needed
What landlords should do when tenant reports a hidden leak
- Respond within reasonable time (24-48 hours typical)
- Investigate on-site; involve a plumber if needed
- Document the condition + source
- File FNOL with your dwelling policy if damage is significant
- Hire restoration contractor (us or other) for mitigation + repair
- Keep tenant informed of timeline + their access during work
What we handle on tenant-landlord jobs
- Mitigation of the water damage inside the unit (water + mold + rebuild portion within our scope)
- Documentation that works for both parties’ insurance claims
- Scheduling that respects tenant occupancy + landlord authorization
- Written estimate per party where scope requires it
What we don’t arbitrate
- Legal disputes between tenant + landlord
- Lease interpretation (that’s the parties’ attorneys)
- Fault determination (that’s between the parties + their respective insurance)
- Tenant complaints about landlord responsiveness (we’re not a mediator)
Hidden leaks in rentals have more complexity than owner-occupied homes. Call (385) 247-9359 and mention the rental situation upfront so we can plan dispatch accordingly.
From hidden leak to visible mold — the timeline most homeowners don’t see
A hidden leak doesn’t skip the mold stage — it just means the mold grows out of sight. Here is what the typical progression looks like inside a wall cavity, under a cabinet, or above a ceiling:
The expensive scenario is month-6 discovery. The cheap scenario is week-2 discovery. The difference between them is routine attention to the house.
How a hidden leak turns into a mold problem
A leak inside a wall or under a floor does not announce itself. By the time you see it, mold may already be part of the job.
Suspect a hidden leak? Call (385) 247-9359 for a free inspection.